How to use your Android smartphone camera and microphone as a PC webcam
If you are using a desktop computer, then webcam and microphone devices may not be available on your computer. You can easily buy a USB Webcam from the market with a built-in microphone, but why do not you try to use your Android smartphone camera and microphone as your Windows PC webcam.
Today Android smartphone is very common and almost everybody will have it, you can connect your Android device to a Windows computer over WiFi network or USB cable and use their camera and microphone on the computer. It will work as a webcam device attached to your computer, like you can make video calls, record videos, capture photos and much more.
Laptop computers already come with the built-in webcam but their quality is not good, so if you are a laptop user, then you can use your Android smartphone as an HD webcam on your laptop device.
Two Android apps to create a PC webcam using a smartphone or tablet
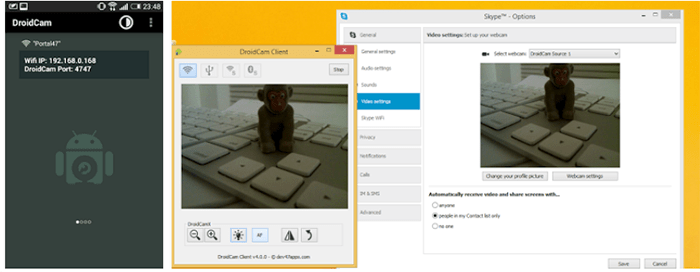
1. DroidCam (Google Play)
DroidCam is a free / paid application that allows you to use your Android smartphone or tablet device as a PC webcam. It uses your smartphone’s camera and microphone device and connects it to a computer over USB cable or WiFi network. Google Play has a paid version of the app, but the free app has all the features you need.
You can also enable HD mode in the app to stream webcam in high definition.
2. IP Webcam (Google Play)
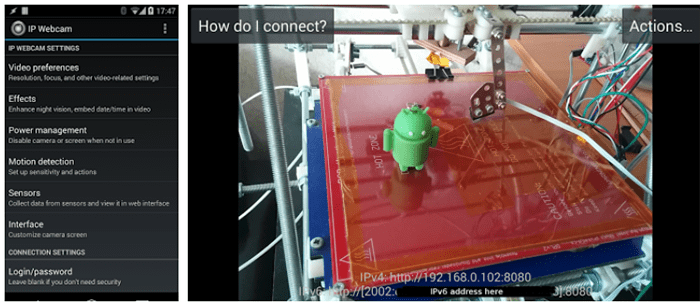
IP webcam is a free app that allows you to use your Android device’s camera as a wireless PC webcam, it supports connections over WiFi, so your computer and Android device should be connected to the same WiFi network, Or your computer should connect to WiFi router via LAN cable.
How to Connect with USB Cable Using DroidCam app
Follow the steps given below:
- Install and open the DroidCam app on your Android device.
- Install and Launch the DroidCam Client Server App on Your Windows Computer.
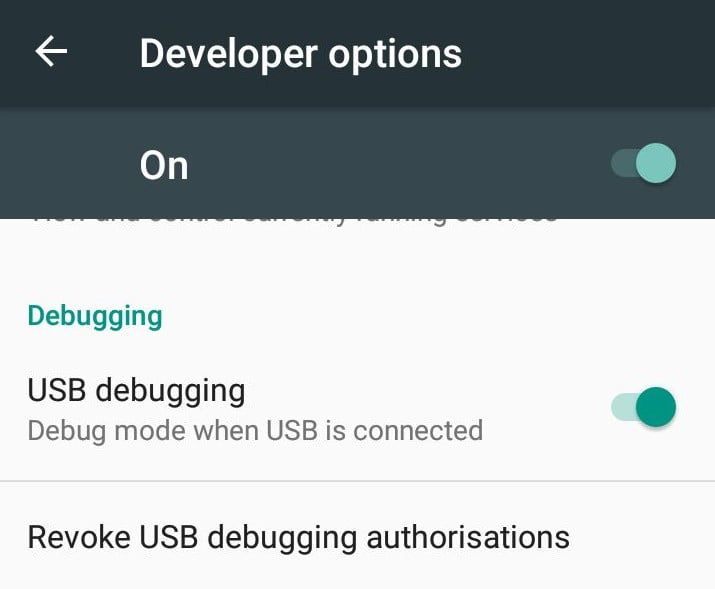
- Enable the USB / Android debugging feature on your smartphone device (Go to Settings> Developer Options> Android or USB debugging, if there is no developer option, go to ‘About phone’ and tap 7-time on Build Number. )
- Connect your Android to your PC via USB cable.
- On the computer, go to the DroidCam Client Server app and select the USB icon.
.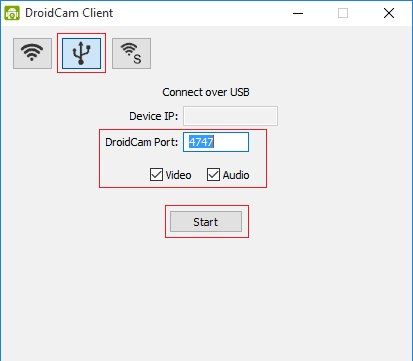
- Match the port number with the number appear in the mobile app, and check ‘Video’ and ‘Audio’ options.
- Press the Start button and test your new Android webcam.
- Do not forget to allow USB debugging access on your Android screen.

Now you can make video calls, record videos on your computer.
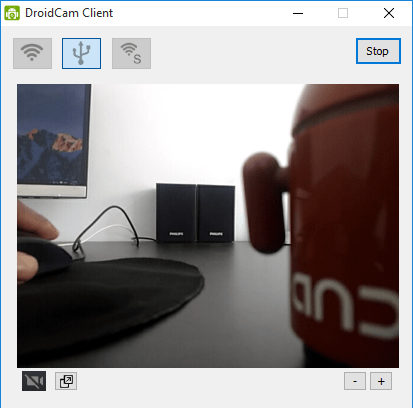
If you want to use only the microphone, then uncheck the video option and check the audio in step 7.
For more help with the DroidCam app, read the official help documentation.
Connect over WiFi network using IP Webcam app
DroidCam can also be used to connect over WiFi network, but I thought the IP webcam app is the best option if you want to connect over WiFi, even it has more options to manage the video and audio quality.
Follow the steps given below:
- Install and open the IP Webcam app on your Android device, scroll down and start the server.
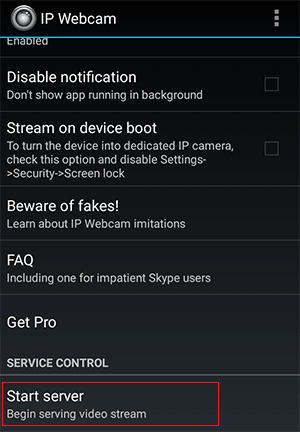
- Download and install the IP Camera Adapter on your Windows computer.
- Examine whether a WiFi camera is working by opening a local URL in a web browser (e.g., http: //192.xxx.xx.xx: xxxx) that appears on your Android.
- Go to the Start menu, search for ‘Configure the IP Camera Adapter’ and open the app.
- Type the local URL shown on your Android device (e.g., http: //192.xxx.xx.xx: xxxx) and apply the settings.
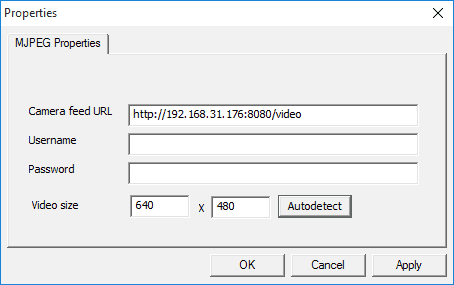
- Now you can make video calls, take photos and much more through any software application installed on your computer.


0 Comments